Sunday, April 15, 2012

Burp Pad


     I had an order for a Boy Diaper Bag this week and thought I would show how to make a quick burp pad to match the bag and wipe case.  I used Riley Blake 100% cotton fabric from the "All Star" Collection designed by "My Mind's Eye" 2009.  The fabric I used for the burp pad is the same fabric I used on the inside of the diaper bag.  I choose to use a fleece fabric because it is so soft, but you can use terry cloth or flannel too. 

Burp Pad


 Supplies:  Sewing machine
                Rotary Cutter, 6x23in ruler, 20x20in ruler (optional), Cutting Mat
                Scissors
                Choice of fabric 1 fat quarter designer fabric and fat quarter of
                   Fleece, Terry Cloth, or Flannel
                Thread to match
                Dessert Plate to make rounded edges.
                Marking pencil of you use light fabric make sure to get an air
                   erase one.
                turning stick


Fabric Choice
 

I layered enough for 2 burp pads

I used the 20 1/2 in ruler and the rotary cutter to cut out a rectangle
20 1/2 x 12 inches
 
all cut out

 
lay them right sides together


Use a marking pencil to mark an opening on one of the short sides
 
Center the dessert plate at each corner and cut with your rotary
or mark a line and cut with Scissors

  
Should look like this now
 
sew a 1/4 in seam starting at the opening mark
for turning and continue around to the other mark


Your opening should look like this, about 3 to 4 inches wide
 
use a turning stick inside to help make a crisp edge

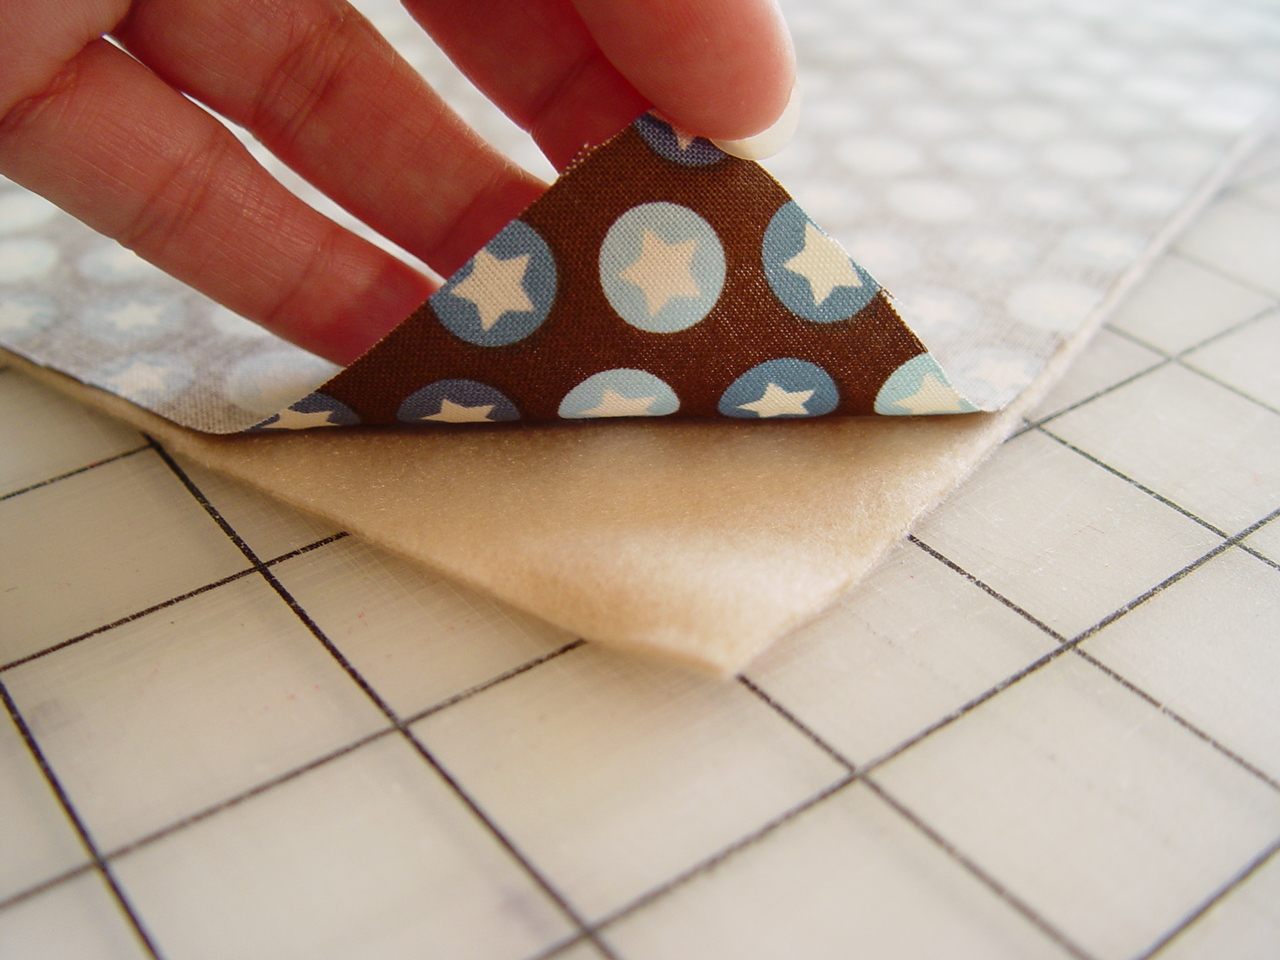
Tuck in the edges about a 1/4 inch so they match the seams
and pin in place
 
use a 1/8in seam all around the edge of the burp pad 

Should look like this
 
and this


now your going to make stay stitches. Make a mark down the
center of the burp pad top to bottom and 3 evenly spaced
across

I used a white marking pencil so I could see the markings and
sew on each line careful not to go over the edge.

Sew down each line
 
All Done!!
 
I usually make girl baby items because I have trouble selecting
fabric for boys, but I am very happy about how this turned out.

It is a personal challenge for me to make boy items because I only
had one child and of course she is a girl. 


Sunday, February 19, 2012

Home Decor Throw Pillow

This week I made a throw pillow with a holiday theme.  Creating for holidays and using fun fabrics keep me in the sewing room.  This projects will take about 2-3 hours.  It is completely washable so you won't have to worry about it getting used.  Since I used allot of different fabric for this project I want to add that you should use fabrics that have all been washed and shrunk or all that have not been washed yet it helps keep the pillow dimensions the same once you do decide to wash it.  OK heres what I did.


Throw Pillow


Supplies: Sewing machine
              Rotary Cutter, Ruler, Mat
              Scissors
              16 fabric choices Measuring 5x5 inches
              Fabric choice for frame and back 1 3/8 yard of fabric.
              Thread to match fabric choices
              Pellon Fusible Thermolam 1 yard (#TP971F)
                   Get it from the bolt because the
                   packaged kind is not wide enough.
              18 inch square pillow

Decide how you want your fabrics be sewn together.  These
pieces will be sewn together with a 1/4 in seam.  You will sew
in columns. Take the first two squares from column one and
sew together


I used a 1/4 in sewing foot to help keep my seams even.


sew the bottom two together and then sew the top 2 to the
bottom 2 making a finished column.


Do this for all four columns, careful not to mix up your
original pattern layout.


In quilting you iron seams opposite of each other so there is
less bulk.  Iron the first Column seams down and the second
column up and so forth.


Next you will sew the columns together matching seams. Use
your fore finger and your thumb to match the seam, you will
feel them interlock between your fingers and put a pin on each
side of the seam.  Do this for all seams and your corners will
match up like you have been sewing for years.


It should look like this before you go to the sewing machine.


Match seams for the last 2 columns and them sew them together.


Corners will look amazing.


Now flip your fabric over to the wrong side and iron your
seams open.


it should look like this now.


Now cut your frame pieces.  I used a rotary cutter for
this part.  They need to be 3 1/2 inches wide by 28 inches long,
I cut the width of the fabric from salvage to salvage then
cut it down to 28 inches. 


I did mitered corners on the front so you will need to make a
mark 1/4 inch from each side as I did in picture. Use a
water soluble pen or air dry pen so it won't be seen later, 
This is where you will began to sew to the next corner mark
leaving a 1/4 in not sewn at each corner.


It will look like this now.  place a pin to keep the fabric out of
the way while you sew on the next side.


it should look like this before you go to the sewing machine.
I use pins allot, it will save you from seam ripping later.


You will place the needle directly in the center of the 1/4 in mark
and sew across to the next mark.


Once you have all four sides sewn on, it will look like this.


To make a mitered corner lay your center fabric wrong sides together
diagonally matching opposite corners.  The frame fabric should
be lying right sides together.  Use picture for a reference.

Use a ruler with a 45 degree angle and mark a line from where
the thread shows to the end of the fabric. 


You will sew on this line to make a nice mitered corner.

It should look like this before you go to the sewing machine.


start with the needle a 1/4 inch in from edge and where the thread
ends as I did in picture.  sew to end of fabric.


Cut off excess fabric a 1/4 inch from the line you just sewed.
Do this for each corner.

Flip your pillow top over and steam iron the seams open. 
Iron the whole top so it lies nice and flat.


Open your Pellon Fusible Thermolam and lay your pillow top in
the center of the rough side.  Lightly iron it to tack it in place. 
careful not to get the sticky stuff on your iron.


then cut it out along the sides


Now iron it to stay in place.  If you would like to add any
quilting to your pillow top you can do that now.  I choose
not to for this tutorial but you could add a dimensional item
such as flowers or a shamrock.  Be sure to stay out of the
frame area you can embellish the frame at the end.  It will
make it easier to sew the front to the back.

Now for the back, you will need 2 pieces cut at
15 1/2 inches wide by 25 inches long.  Mark a line 1 inch
and 1 1/2 inch from the edge of the Long side of this piece.


Fold to the first line and iron.  Fold again to the next line and
iron again you will have a finished seam for your pillow opening. 
Do this to both pieces but only on one long side of each. Sew along
the edge at 3/8 inch to close.


your back pieces should look like this on one long edge.


Lay your pillow top right side up, if you have a pattern
make sure it is up right and place your pillow backs
right side down with the finished edges in the center. 
You will see that there is an overlap of fabric on the
top and bottom.  you can cut this away after you pin your
pieces in place.


Cut excess away after you pin in place.  This is so the piece can
 accommodate for the way people sew.  Rarely do 2 people sew a
seam the same size.


Your piece should look like this now.  I put pins in the center
 to keep it flat while I was sewing around the edge.


If you have a walking foot I would suggest you use it for this
next part.  It really keeps the fabric feeding through the sewing
machine evenly.  It is not a "must have" but it sure helps.  Sew
a 1/2 inch seam completely around the pillow.


Once you have sewn all around your pillow, cut your corners
like this, and turn right side out from the center openings.


Pin around the pillow to match the side seams up so it is flat.
Then pin where the center meets the frame.  You will sew what is called
an "In the Ditch" stitch.  You'll want to match the thread to the center
color and sew around the pillow just inside, very close to the
frame fabric but not on it.


Remove your pins and press with a steam iron.


This is what it will look like from the back view.  You can see
the sewn line from your "In the Ditch" stitch.  This will hold
the pillow in the center and give you a nice framed pillow.

Finished Pillow, I will probably make one more like this, then use up the
scrap pieces to make a table runner to match but thats next week.
Thanks for following me here at Sunflower Happiness. 
If you have any questions please ask.